This section uses FFMedia SDK 2.6.1 as an example, and with the prebuilt ffmedia CLI builds a complete pipeline of camera capture → window preview → H.265 hardware encoding → MP4 recording.
Preparing the Environment
Hardware Environment
Prepare the following hardware:
- Firefly RK platform (for example, ROC-RK3588-RT running Firefly Ubuntu 22.04)
- A USB camera or another video source that the Firefly platform can recognize as a video device
After connecting the camera to the target platform, first check the video device path, permissions, and supported formats:
ls -l /dev/video*
v4l2-ctl -d /dev/video0 --all          # Show device details
v4l2-ctl -d /dev/video0 --list-formats-ext   # Show supported formats
Software Environment
Extract the SDK release package and confirm the CLI works:
tar -xzvf ffmedia_release-2.6.1.tar.gz
cd ffmedia_release-2.6.1

./bin/ffmedia --help
./bin/ffmedia run --help
Check which modules are available at runtime:
./bin/ffmedia modules
./bin/ffmedia params cam
./bin/ffmedia params mpp-enc
./bin/ffmedia params renderer-video
./bin/ffmedia params file-writer
The four modules used in this section’s pipeline:
| Module | Category | Purpose |
|---|---|---|
cam |
Input (vi) | Capture raw camera frames via V4L2 |
renderer-video |
Output (vo) | Display the camera image in a window |
mpp-enc |
Process (vp) | Encode raw frames to H.265 using Rockchip MPP |
file-writer |
Output (vo) | Mux the encoded stream into an MP4 file |
Verifying the Camera Works (Capture Only)
Start with the simplest pipeline — capture only, no display — to verify that the camera works:
./bin/ffmedia run \
  -m src=cam \
  -p 'src:device=/dev/video0;capture{width=1920;height=1080}'
This command:
- Uses
-m src=camto declare a capture module instance namedsrc - Uses
-pto set the device path and capture resolution (sub-parameters separated by;) - Connects no Consumer, so there is no window and no output file
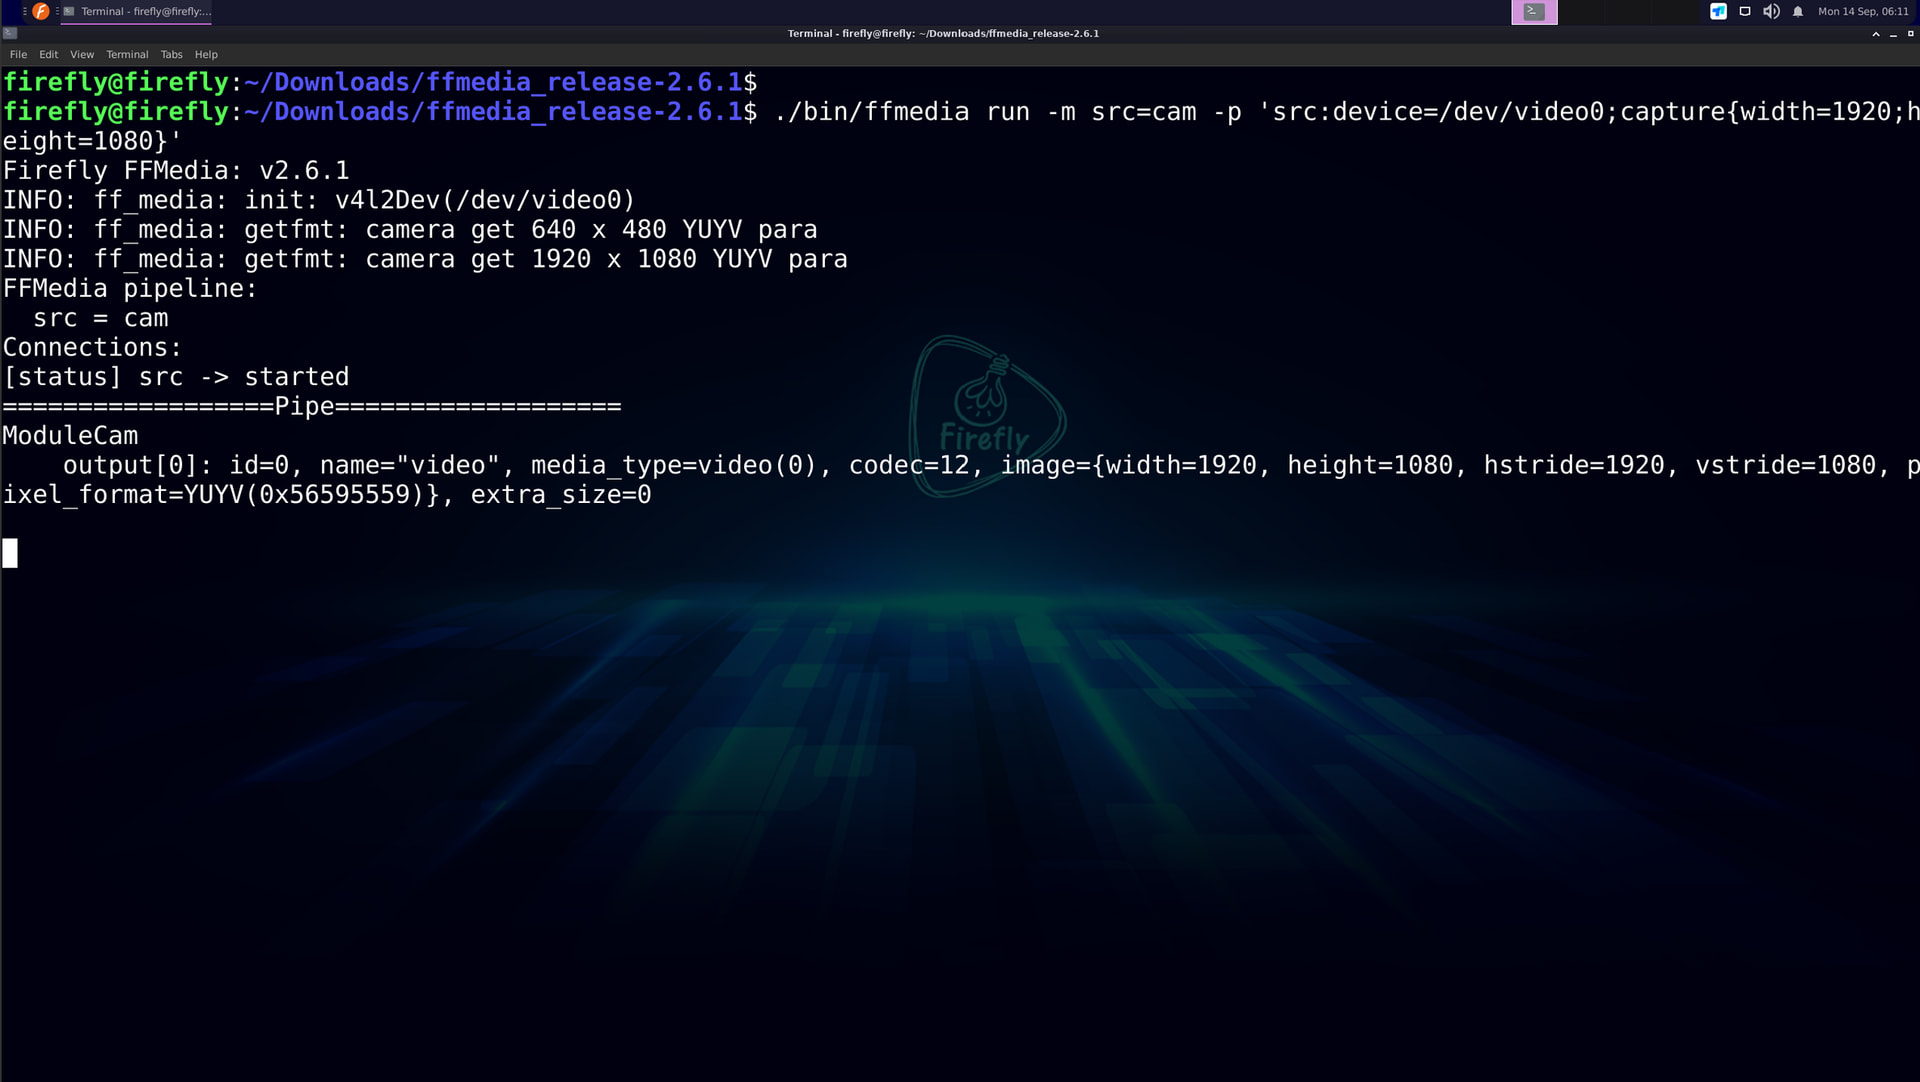
If this command runs without errors, the camera has been correctly recognized.
Adding Window Preview
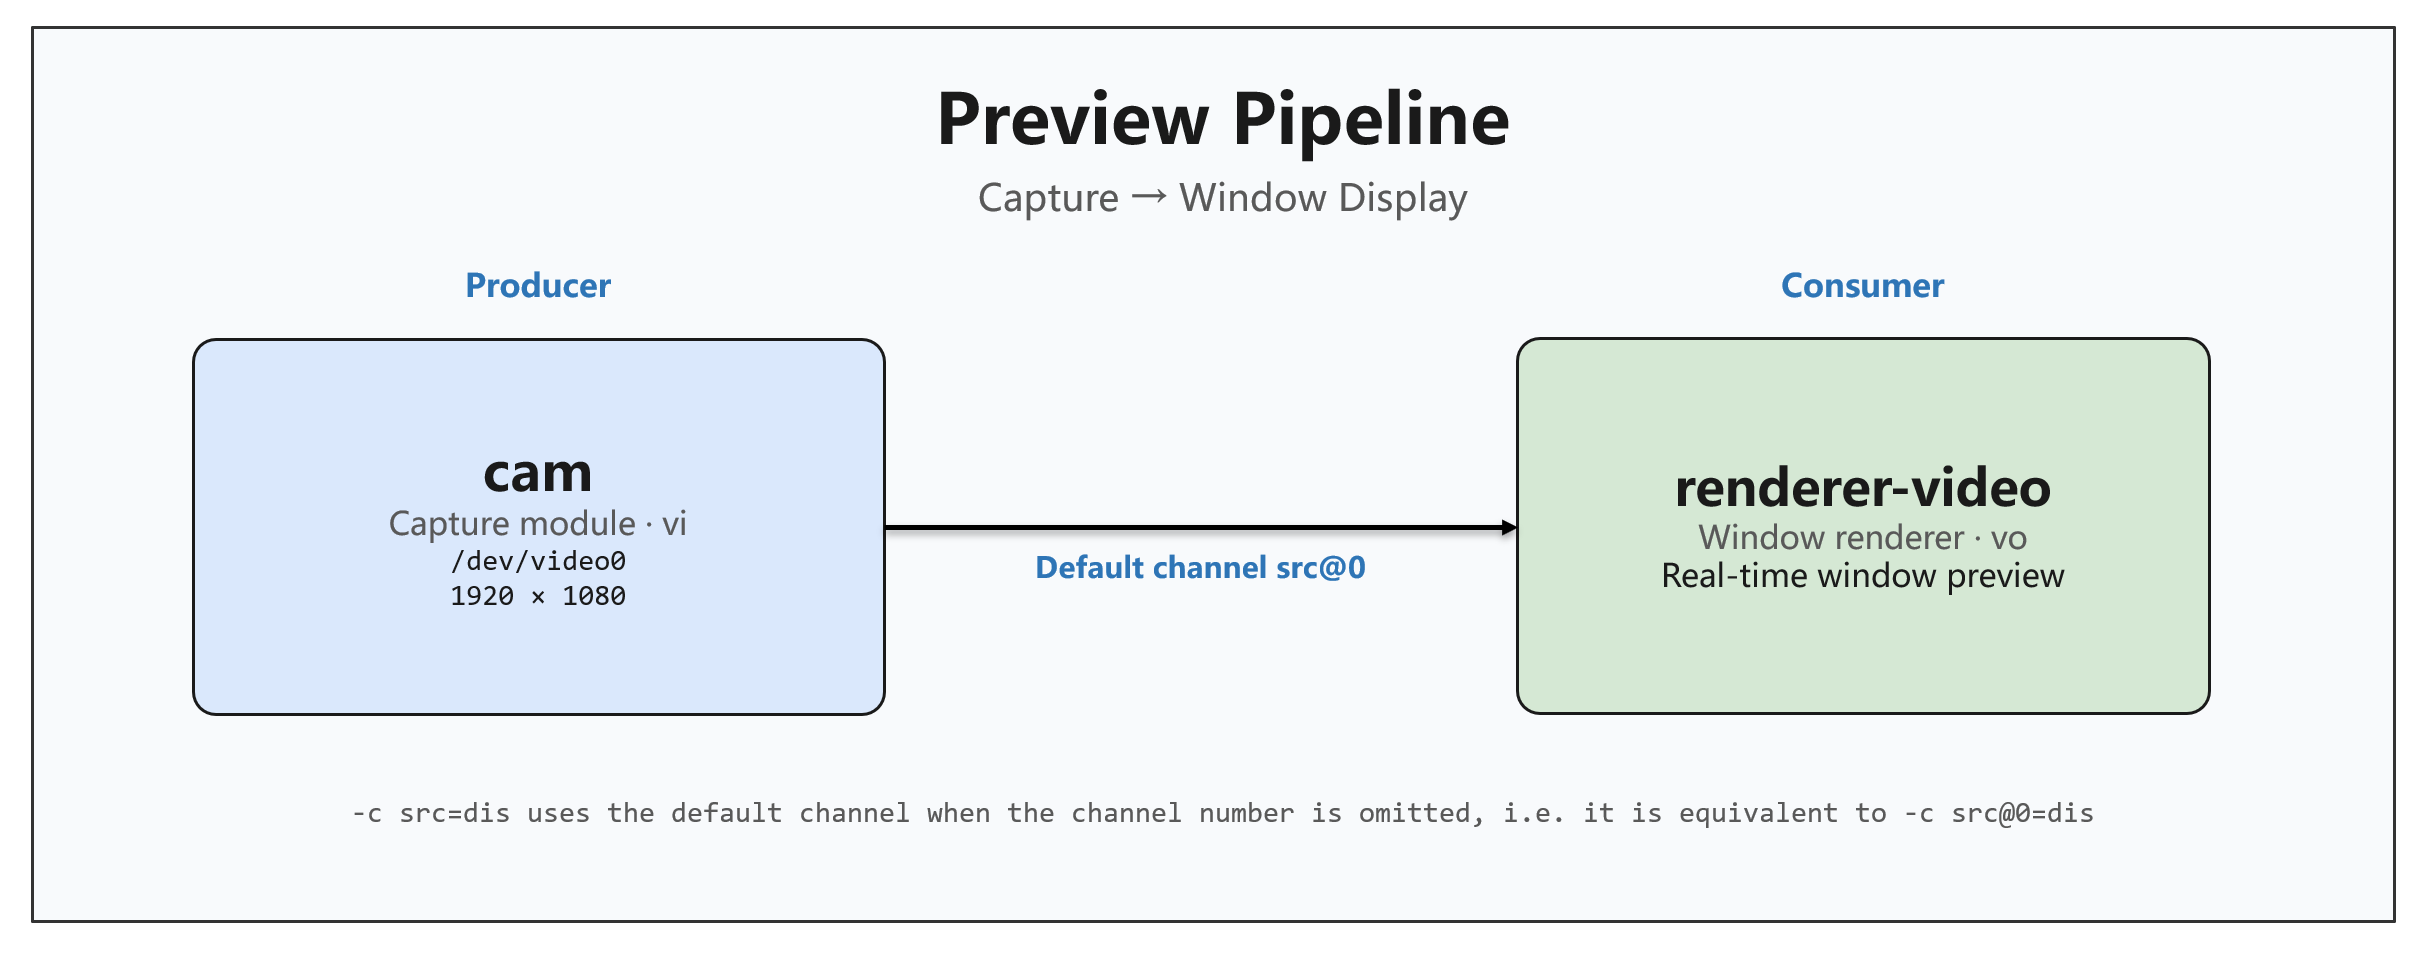
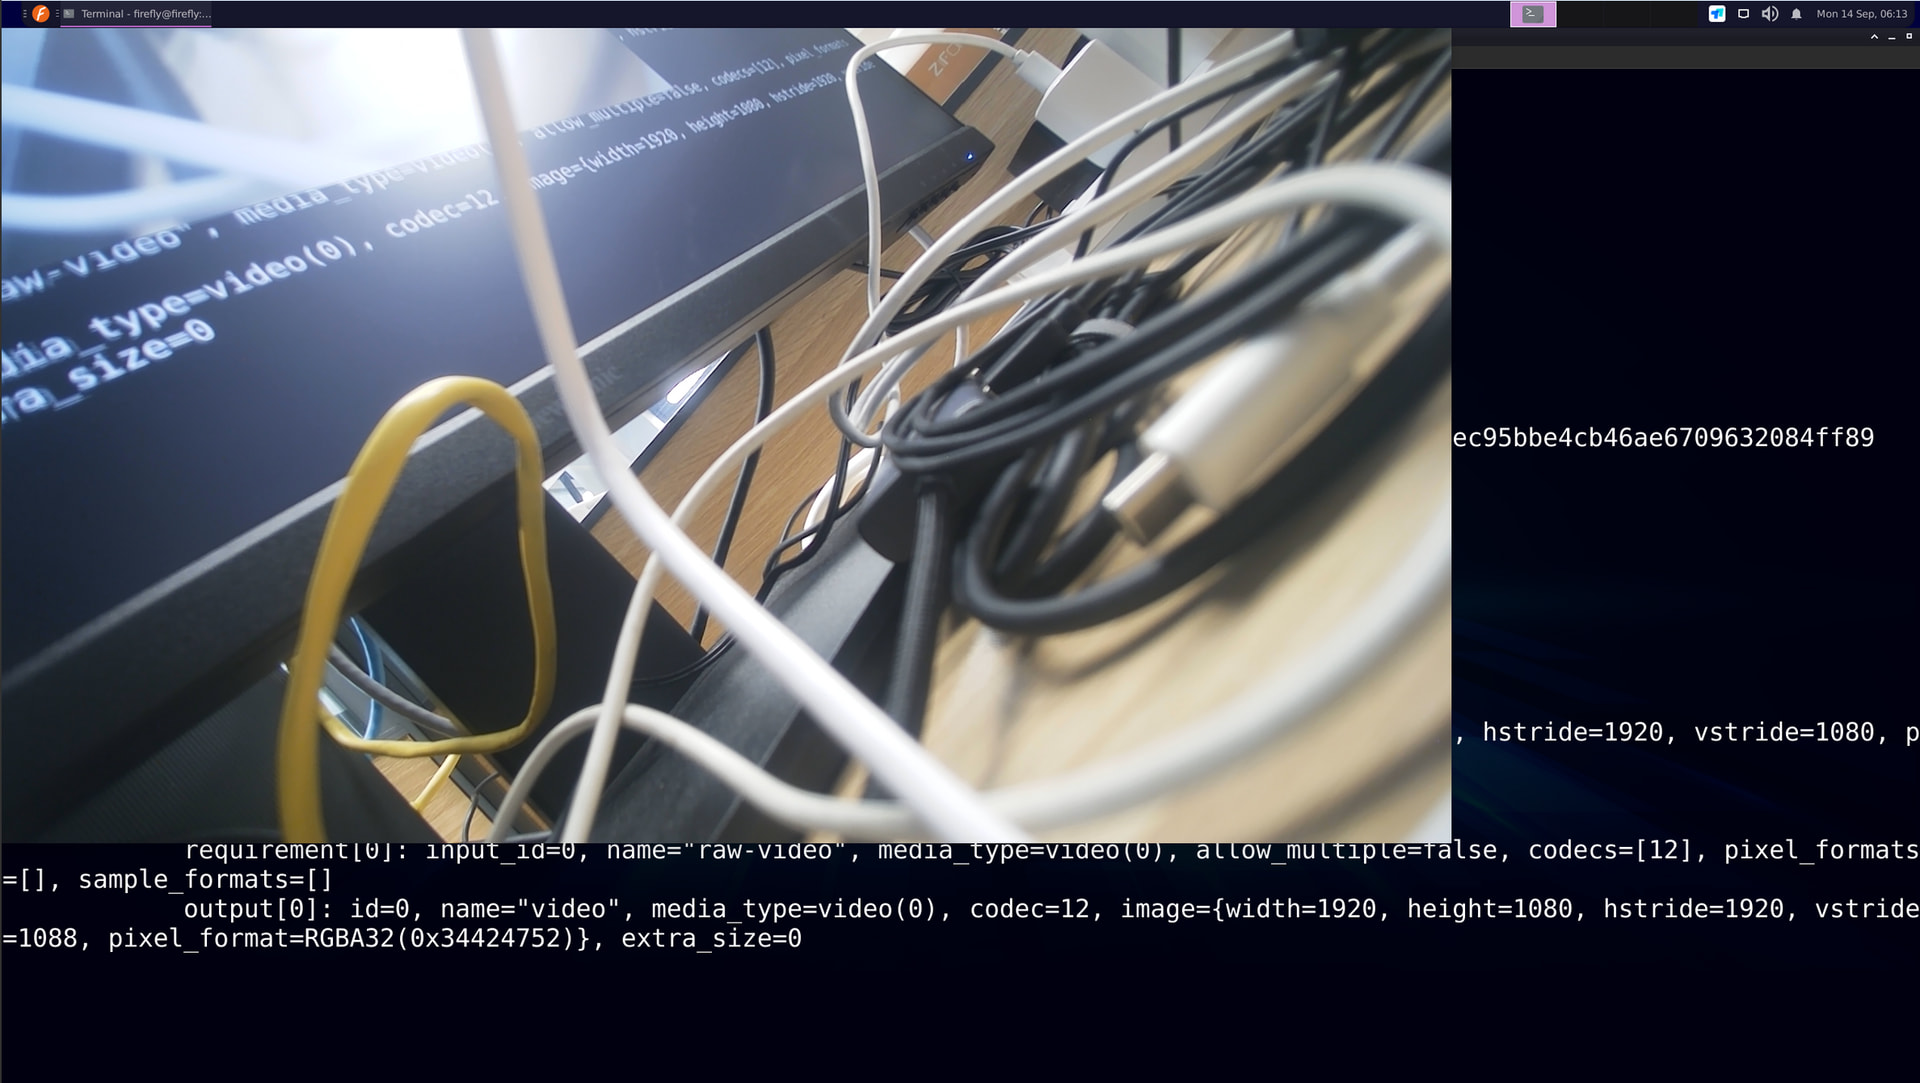
On top of capture, add a display module to preview the captured image.
Pipeline Structure
Full Command
./bin/ffmedia run \
  -m src=cam \
  -p 'src:device=/dev/video0;capture{width=1920;height=1080}' \
  -m dis=renderer-video \
  -c src=dis
Command Breakdown
| Part | Meaning |
|---|---|
-m src=cam |
Declare the capture module instance src |
-p 'src:device=...;capture{...}' |
Specify the device path and capture resolution; multiple sub-parameters are separated by ; |
-m dis=renderer-video |
Declare the window rendering module instance dis |
-c src=dis |
Connect src → dis; omitting the channel number uses the default channel, equivalent to src@0=dis |
Configuring the Preview Window Position and Size
You can configure the preview window’s position and size via the window parameter (for example, position (200, 0) and size 640×480):
./bin/ffmedia run \
  -m src=cam \
  -p 'src:device=/dev/video0;capture{width=1920;height=1080}' \
  -m dis=renderer-video \
  -c src=dis \
  -p 'dis:window{x=200;y=0;width=640;height=480}'
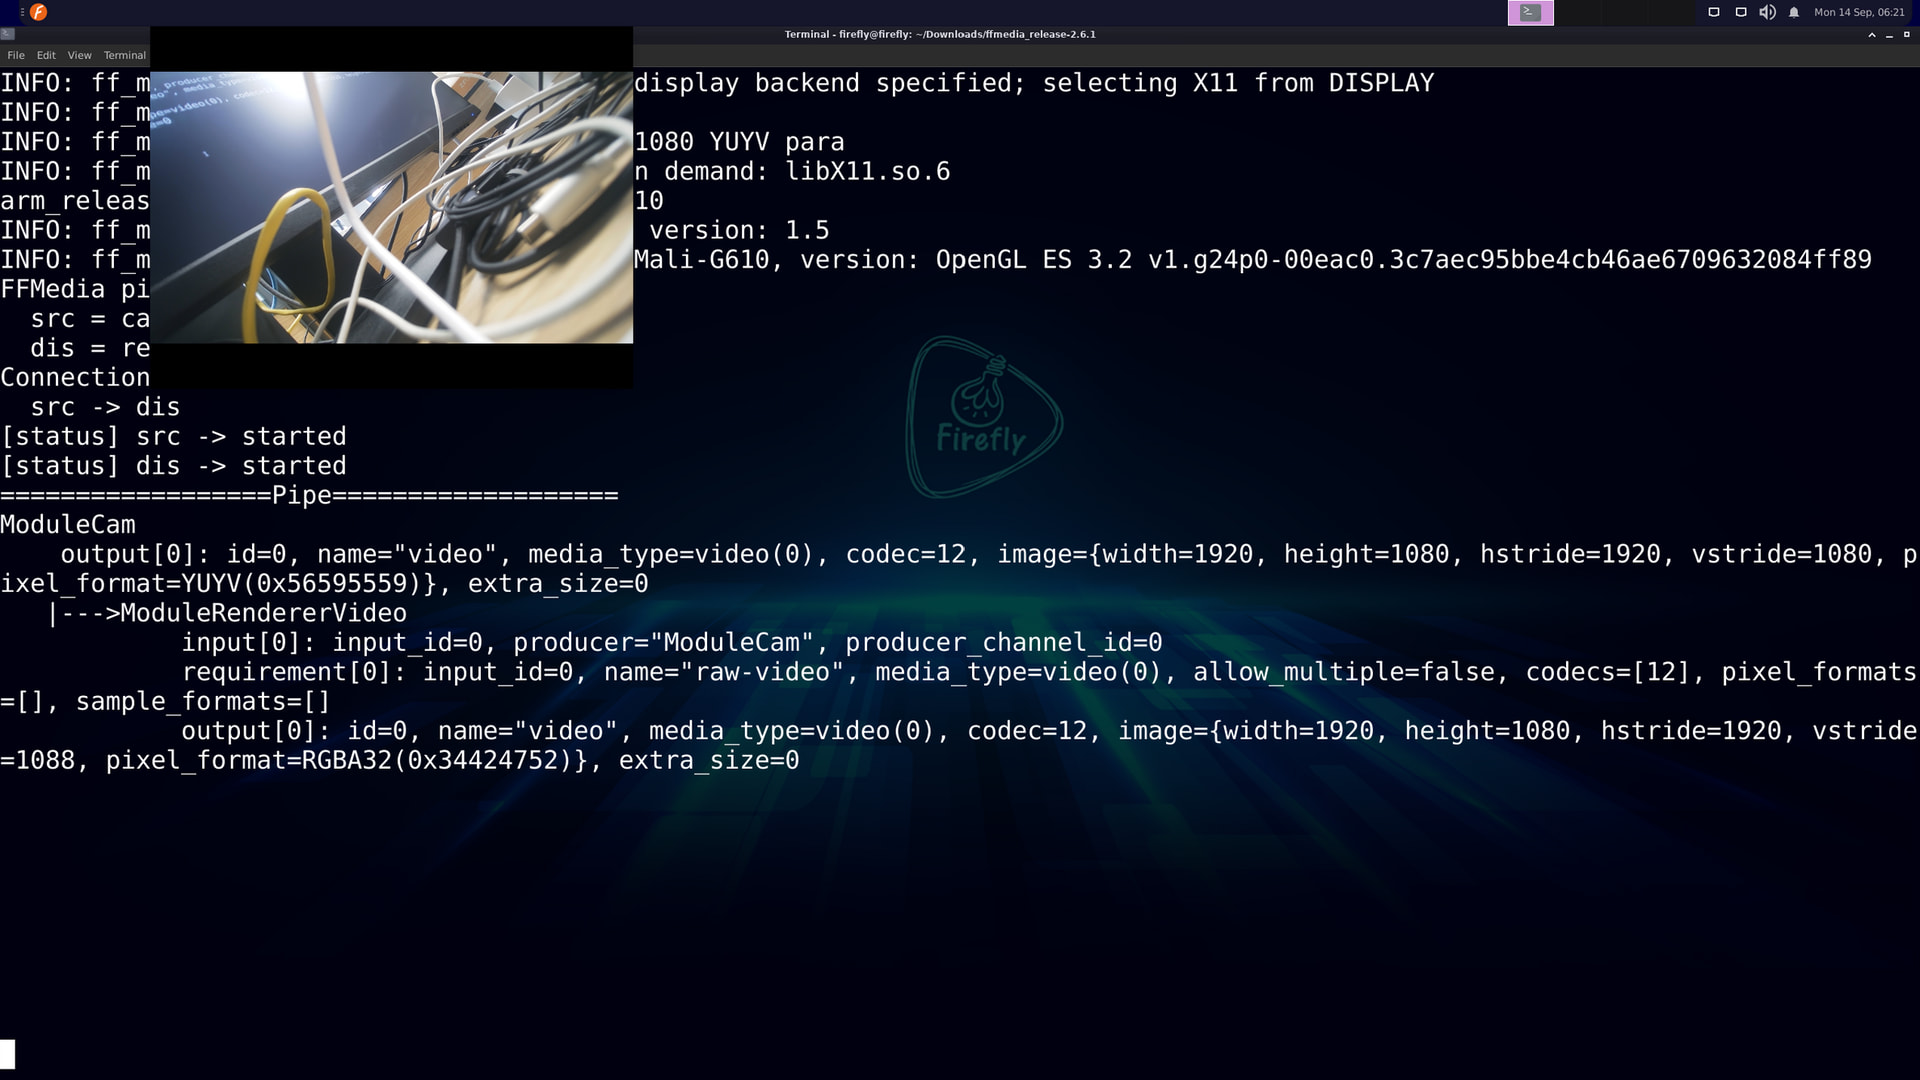
The preview window will display at the configured position and size. Press Ctrl + C to stop the preview.
Previewing and Recording Simultaneously (Branch Pipeline)
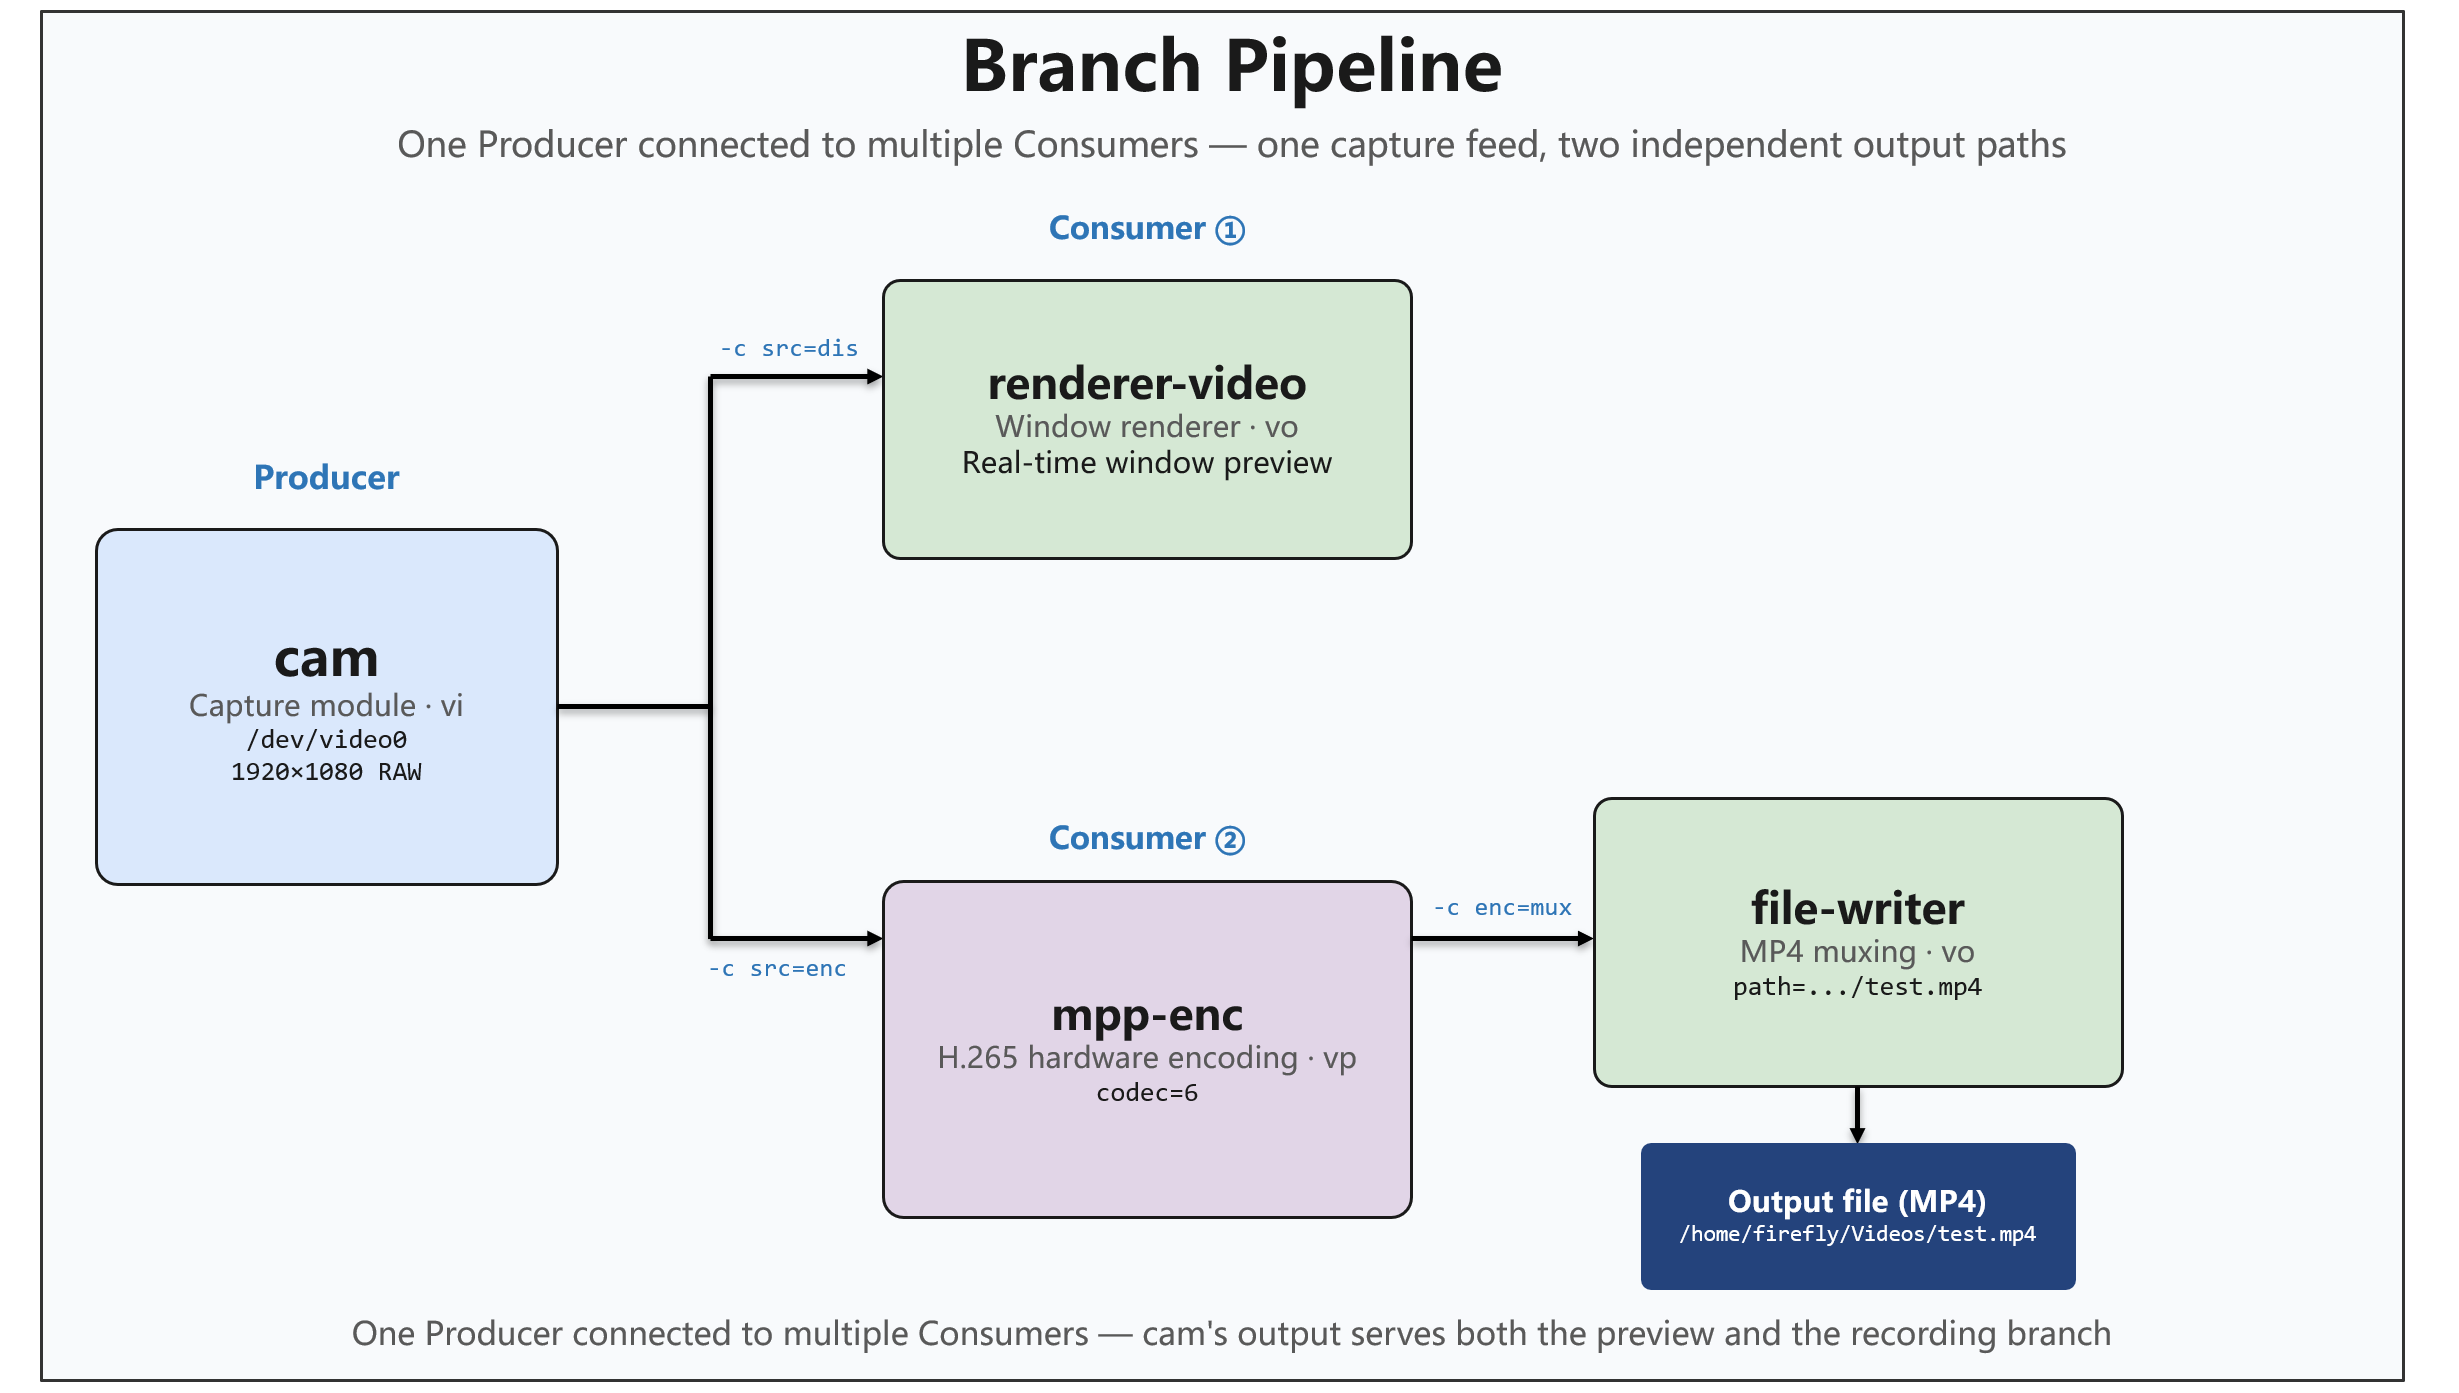
One of FFMedia’s core features is that a single Producer can connect to multiple Consumers. This step splits the cam output into two paths:
- Branch 1: fed directly to
renderer-videofor window preview - Branch 2: fed to
mpp-encto encode as H.265, then tofile-writerto mux into an MP4 file
The two branches do not affect each other and share the same captured data.
Pipeline Structure
Full Command
./bin/ffmedia run \
  -m src=cam \
  -p 'src:device=/dev/video0;capture{width=1920;height=1080}' \
  -m dis=renderer-video \
  -p 'dis:window{x=200;y=0;width=640;height=480}' \
  -c src=dis \
  -m enc=mpp-enc \
  -p 'enc:encode/codec=6' \
  -c src=enc \
  -m mux=file-writer \
  -p 'mux:path=/home/firefly/Videos/test.mp4' \
  -c enc=mux
Breakdown of the Newly Added Options
| Part | Meaning |
|---|---|
-m enc=mpp-enc |
Declare the hardware encoding module instance enc |
-p 'enc:encode/codec=6' |
Set the encoding format to 6, which means H.265 (encode/codec is a sub-parameter path) |
-c src=enc |
Branch the capture output into the encoding module (the second Consumer of the same Producer) |
-m mux=file-writer |
Declare the file output module instance mux |
-p 'mux:path=...' |
Specify the MP4 output path |
-c enc=mux |
Feed the encoded stream into the mux/file-writing module |
Throughout the command, the cam instance is always named src, and it connects to two Consumers at the same time via -c src=dis and -c src=enc. This is the most direct demonstration of “one Producer → multiple Consumers” — no additional dispatch logic is needed; the framework handles it automatically.
Video Codec Enumeration Reference
Values of the encode/codec parameter correspond to different video encoding formats; common values are as follows:
| Enum Name | Integer Value | Description |
|---|---|---|
MEDIA_CODEC_UNKNOWN |
0 | Unknown codec format |
MEDIA_CODEC_VIDEO_VCM |
1 | VCM video encoding |
MEDIA_CODEC_VIDEO_MPEG4 |
2 | MPEG-4 video encoding |
MEDIA_CODEC_VIDEO_MPEG1 |
3 | MPEG-1 video encoding |
MEDIA_CODEC_VIDEO_MPEG2 |
4 | MPEG-2 video encoding |
MEDIA_CODEC_VIDEO_H264 |
5 | H.264 (AVC) video encoding |
MEDIA_CODEC_VIDEO_H265 |
6 | H.265 (HEVC) video encoding ← used in this section’s example |
MEDIA_CODEC_VIDEO_VP8 |
7 | VP8 video encoding |
MEDIA_CODEC_VIDEO_VP9 |
8 | VP9 video encoding |
MEDIA_CODEC_VIDEO_AV1 |
9 | AV1 video encoding |
MEDIA_CODEC_VIDEO_MJPEG |
10 | Motion JPEG video encoding |
MEDIA_CODEC_VIDEO_H266 |
11 | H.266 (VVC) video encoding |
MEDIA_CODEC_VIDEO_RAW |
12 | Raw video data |
For details, refer to the SDK’s include/ffmedia/base/ff_type.hpp.
Verifying the Recording
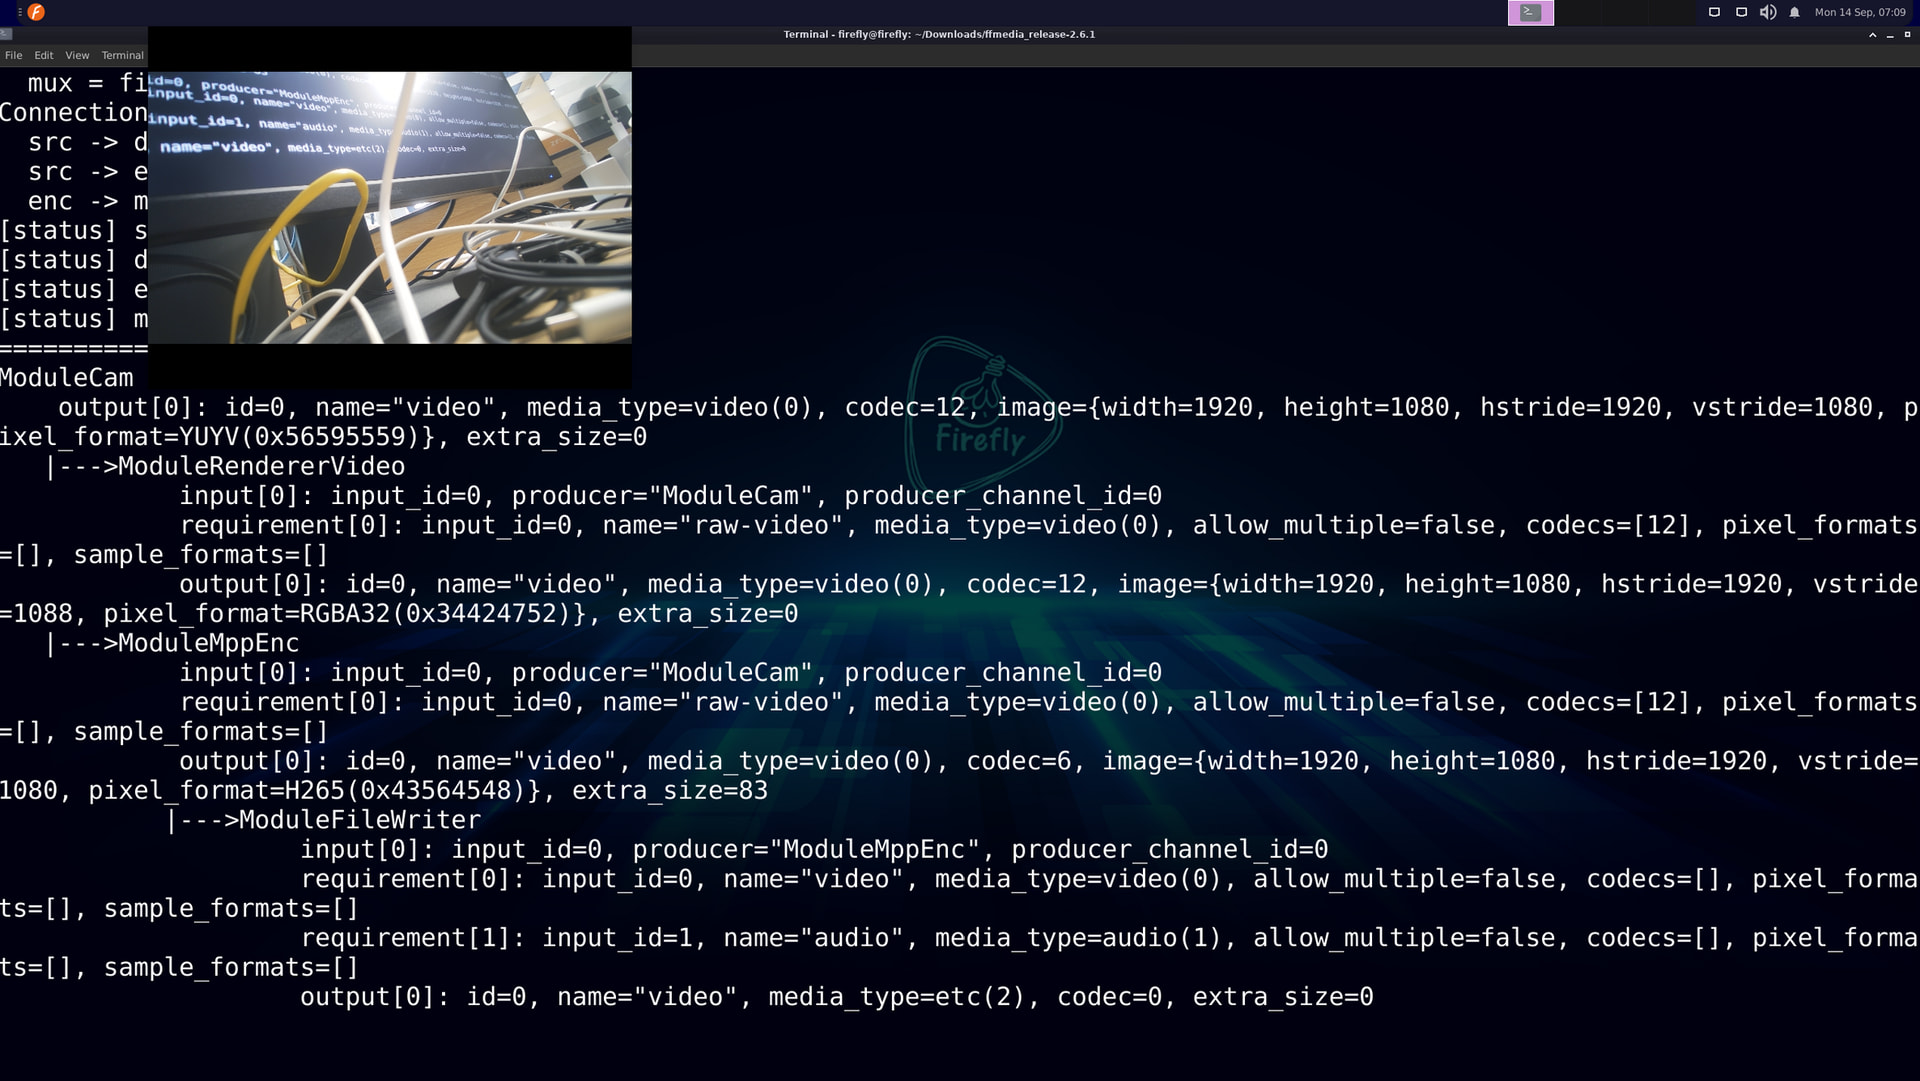
After running, you can observe both of the following at the same time:
- Display window: real-time preview of the camera image
Videosfolder: thetest.mp4file keeps growing during recording
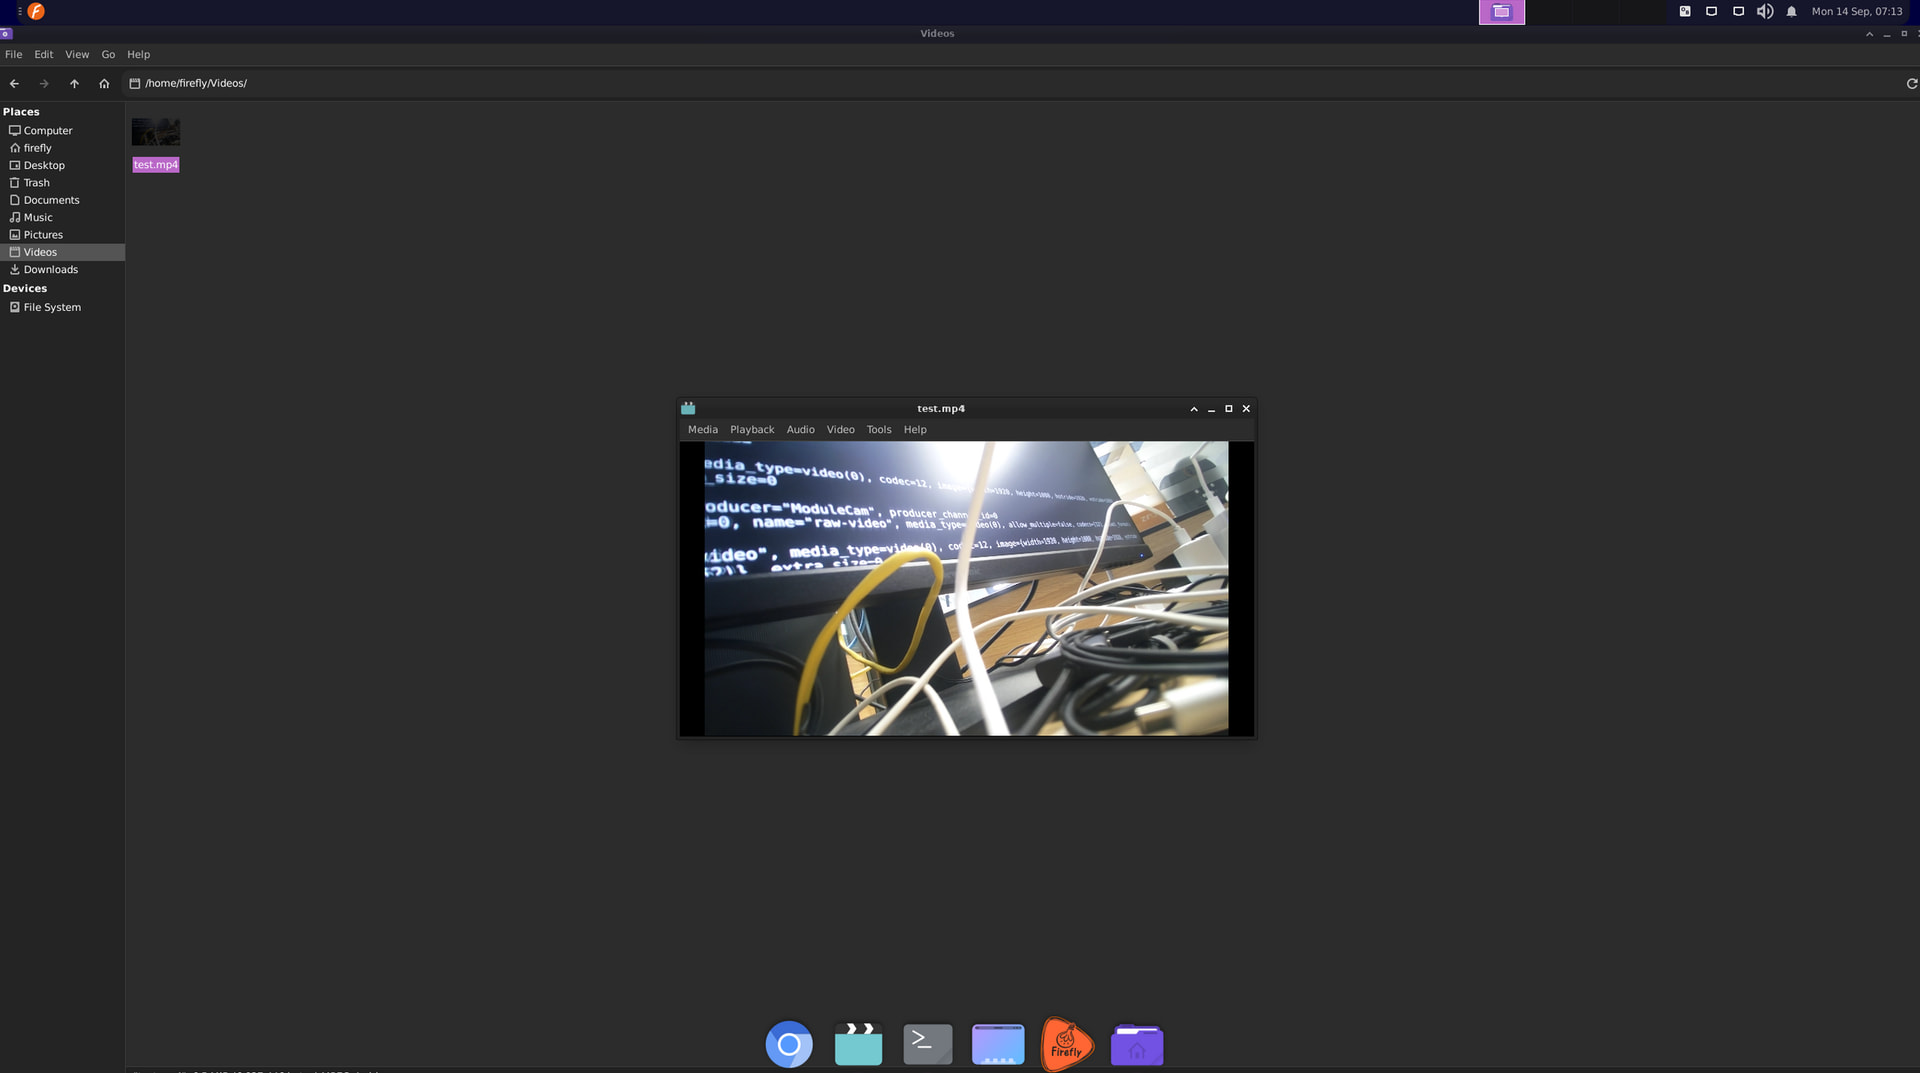
After stopping the pipeline normally with Ctrl + C, open test.mp4 with a system player to play back the camera footage that was captured.
Note: MP4 is a container format, so it requires a graceful stop (
Ctrl+Corkill -INT <PID>) to write the file index completely. If the process is force-killed (for example, withkill -9), the file may be zero bytes, have an abnormal duration, or be entirely unplayable. Always exit gracefully withCtrl+Cduring day-to-day debugging.
Summary
This section used one real pipeline to turn the three CLI essentials from the previous section into runnable commands:
- Step 1 (capture only): use
camto verify the camera works, as the basis for subsequent steps; - Step 2 (add preview): add
renderer-videoand complete the first connection via-c src=disto achieve window preview; - Step 3 (add recording): building on step 2, add
mpp-enc+file-writerand wire up the second connection via-c src=encand-c enc=mux— one Producer → multiple Consumers.